

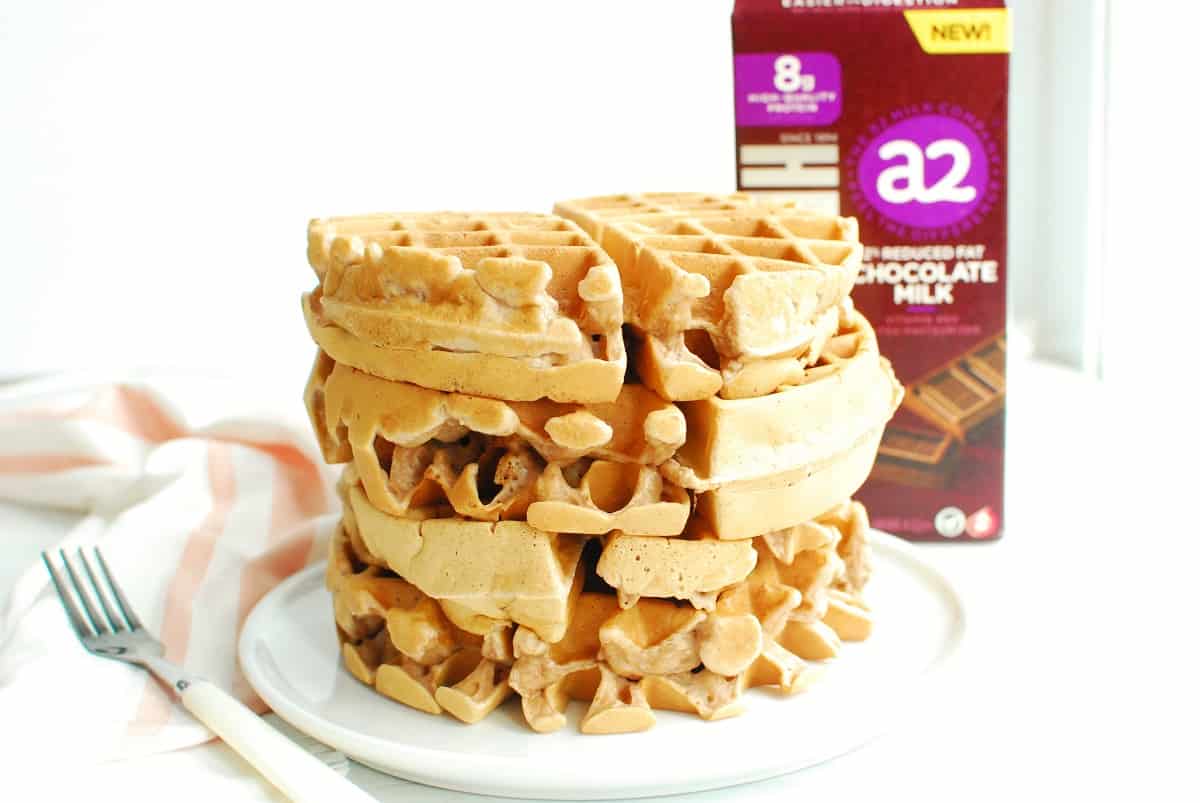
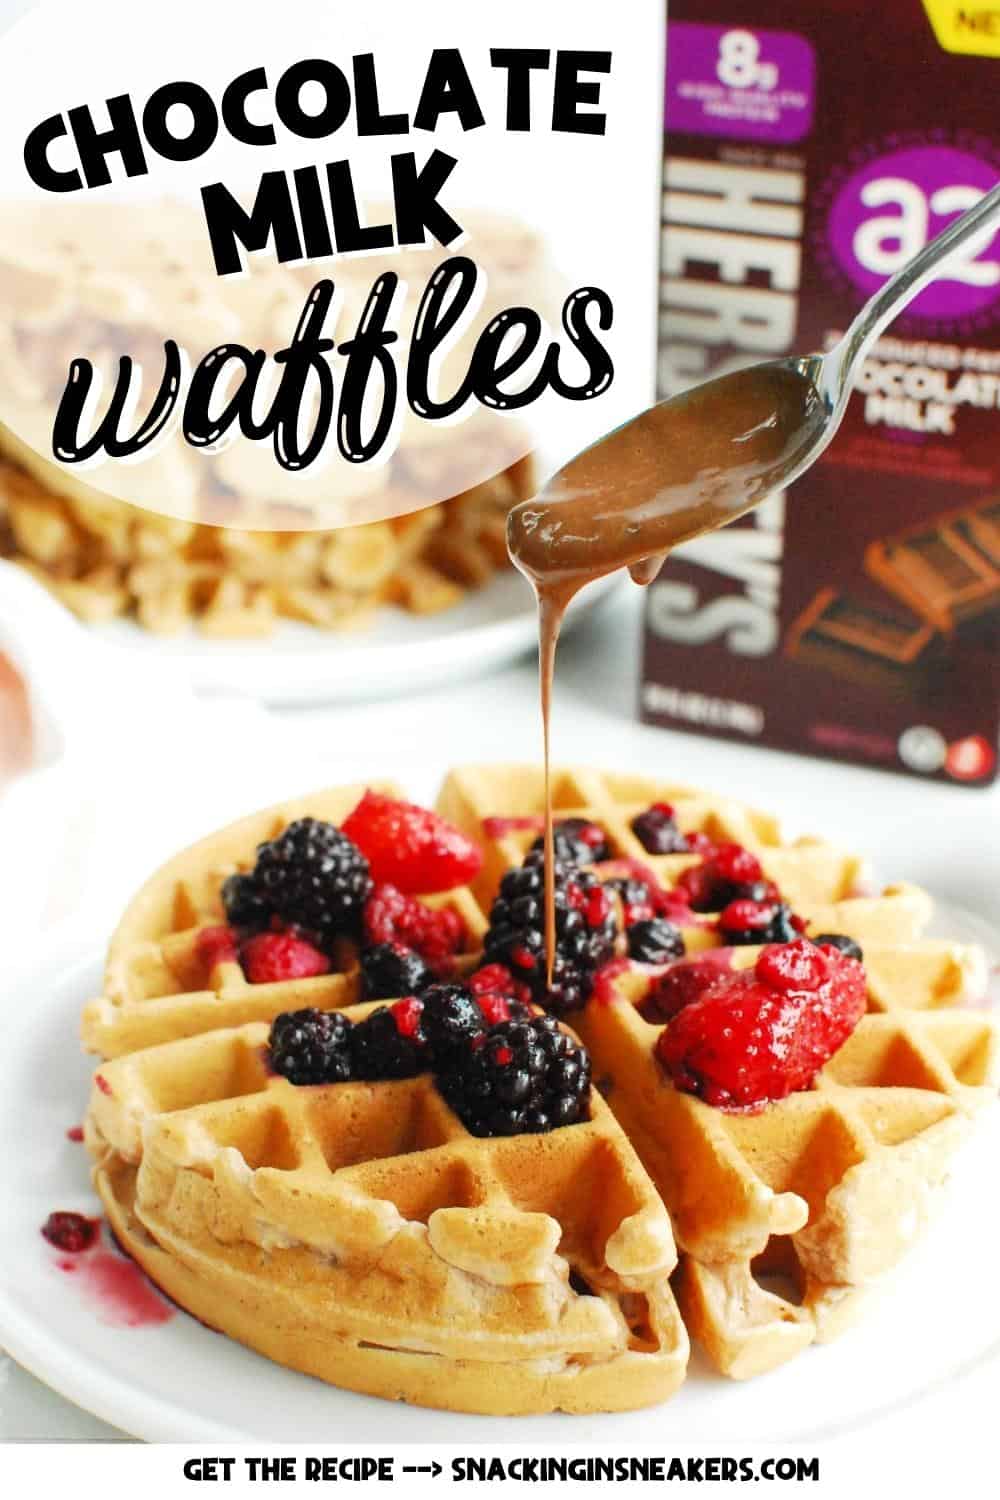
These chocolate milk waffles are light, fluffy, and utterly delicious. The chocolate milk gives the waffles a subtle hint of cocoa flavor, and then you’ll top ‘em off with a peanut butter chocolate drizzle and juicy mixed berries. Perfect for a weekend brunch – or a recovery meal after a long workout!
Disclosure: This post is sponsored by a2 Milk®. As always, all opinions are my own.

Ingredients
Here’s a photo of everything you’ll need to make the waffles, along with selected ingredient notes:
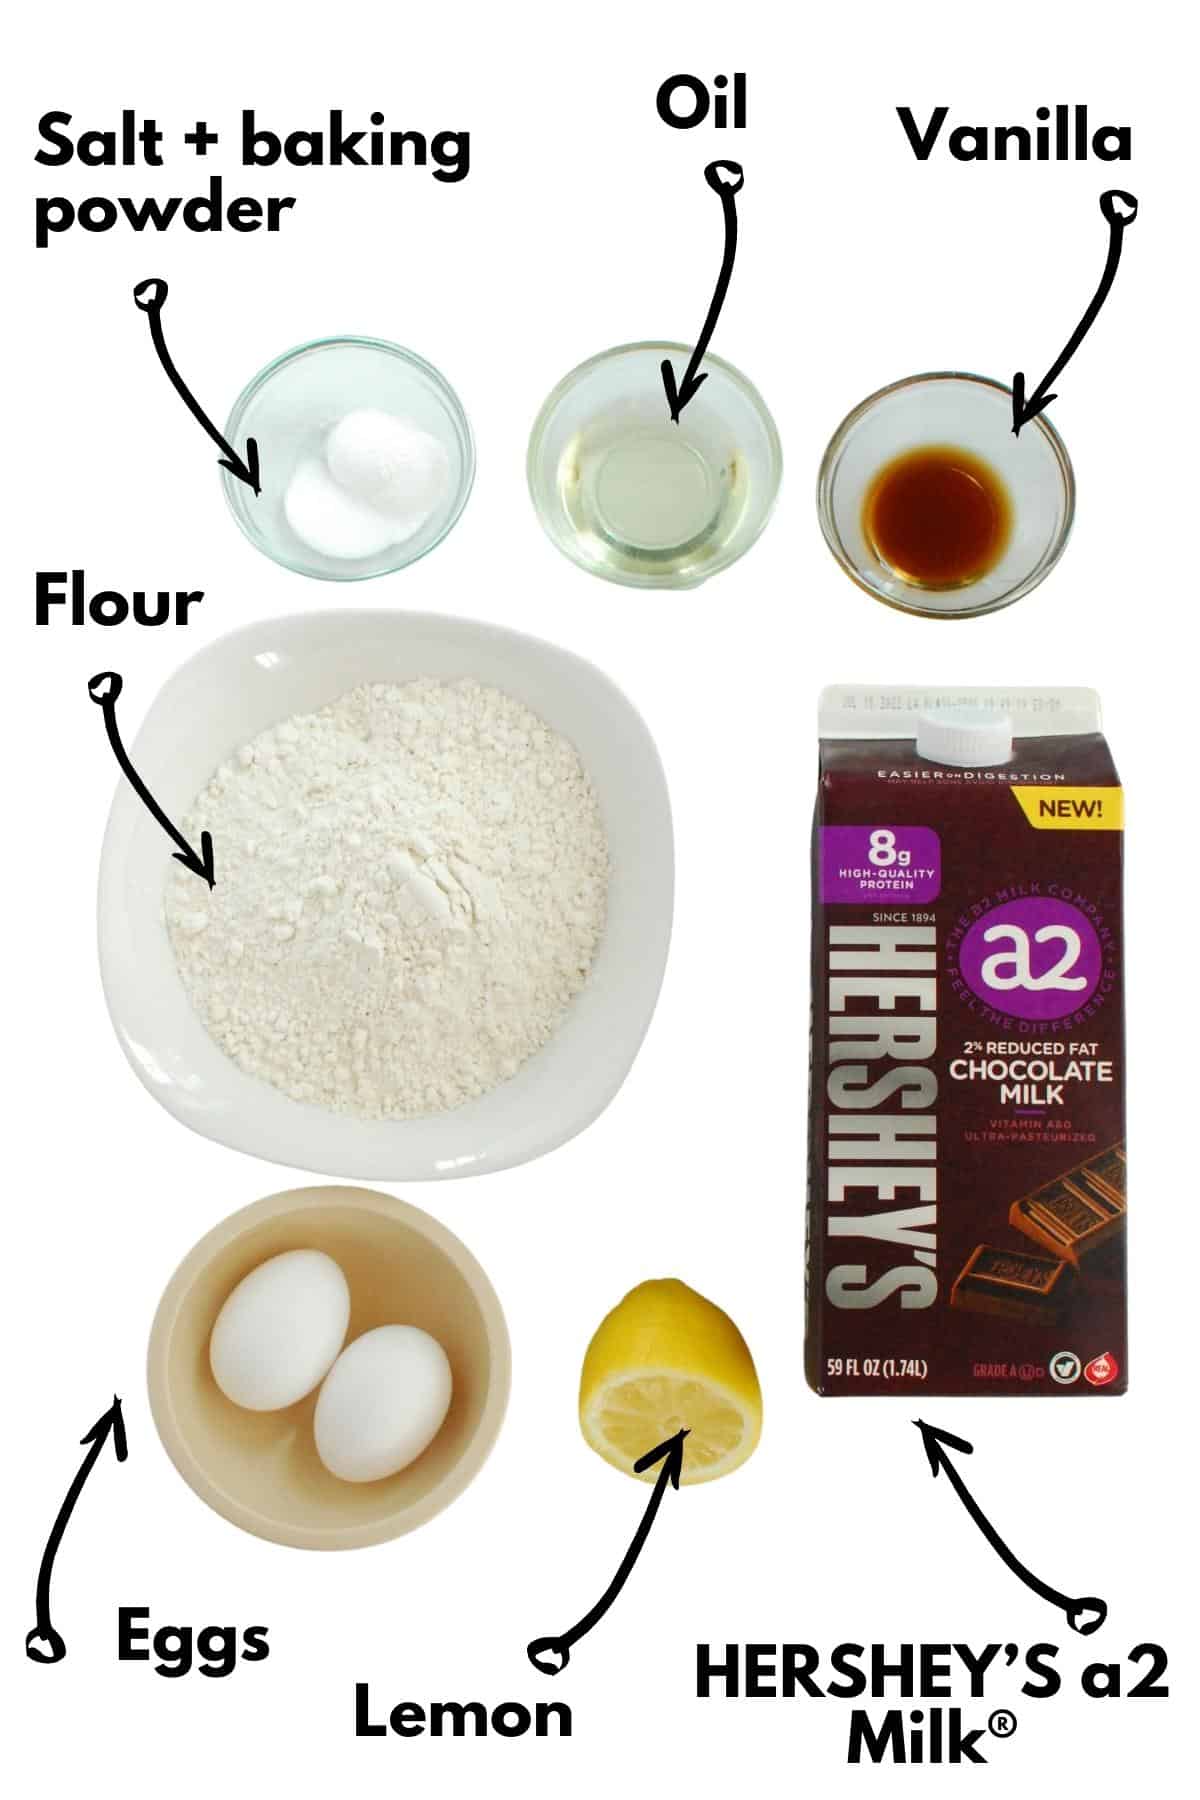
- HERSHEY’S a2 Milk® – Have you ever heard of a2 Milk®? It’s real dairy milk that comes from cows that naturally produce only the A2 protein and no A1 protein. Research suggests this type of milk may be easier for some people to digest. If you normally get a little stomach discomfort from traditional milk, it’s worth giving a2 Milk® a try and see if you have less discomfort! The HERSHEY’S version used in this recipe is so creamy and chocolatey, making it perfect for these waffles.
- Avocado oil – Oil helps waffles crisp up. I like avocado oil for its neutral flavor, but you can certainly also use olive oil or vegetable oil if that’s what you have on hand.
You’ll also make a delicious chocolate peanut butter drizzle and add some mixed berries on top of your waffles. (You could also just go with pure maple syrup, but I recommend trying it this way). For this, you’ll need three ingredients:
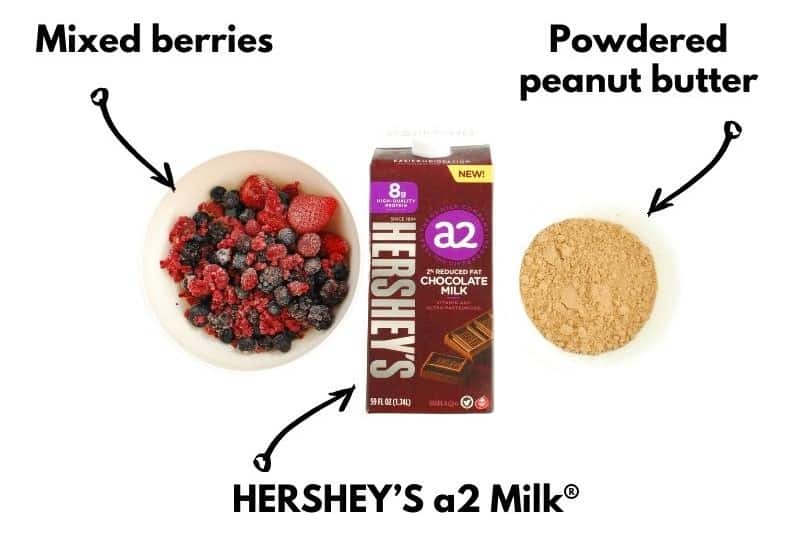
- Mixed berries – I always keep frozen mixed berries on hand, since they’re cheap, last a long time, and are perfect for heating up to top waffles, pancakes, yogurt, and other meals!
- Powdered peanut butter – You can typically find this at any major grocery store, or you can order it online. While I love standard peanut butter, I find powdered peanut butter makes for a better “drizzle” on top of things like waffles or pancakes.
- More chocolate milk – That’s right, instead of rehydrating the powdered peanut butter with water, we’re going to do that with chocolate milk. Game changer!
Instructions
You’ll find the full ingredient amounts and instructions in the recipe card at the bottom of the page, but here’s a helpful overview with process photos.
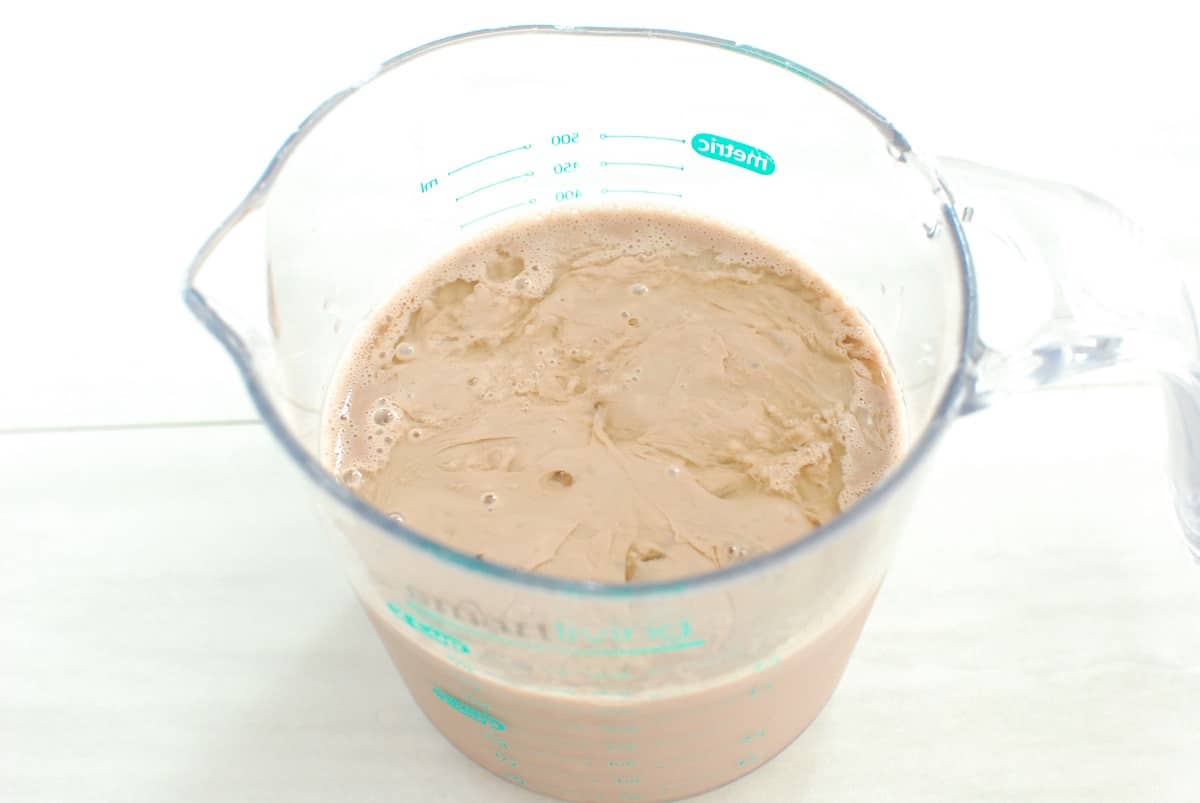
Start by measuring out the chocolate milk and adding the lemon juice to it. Let that sit for about 5 minutes. This creates a faux chocolate “buttermilk” that works really well in the waffles (and pancakes too). (It’s normal if this looks a little curdled after sitting).
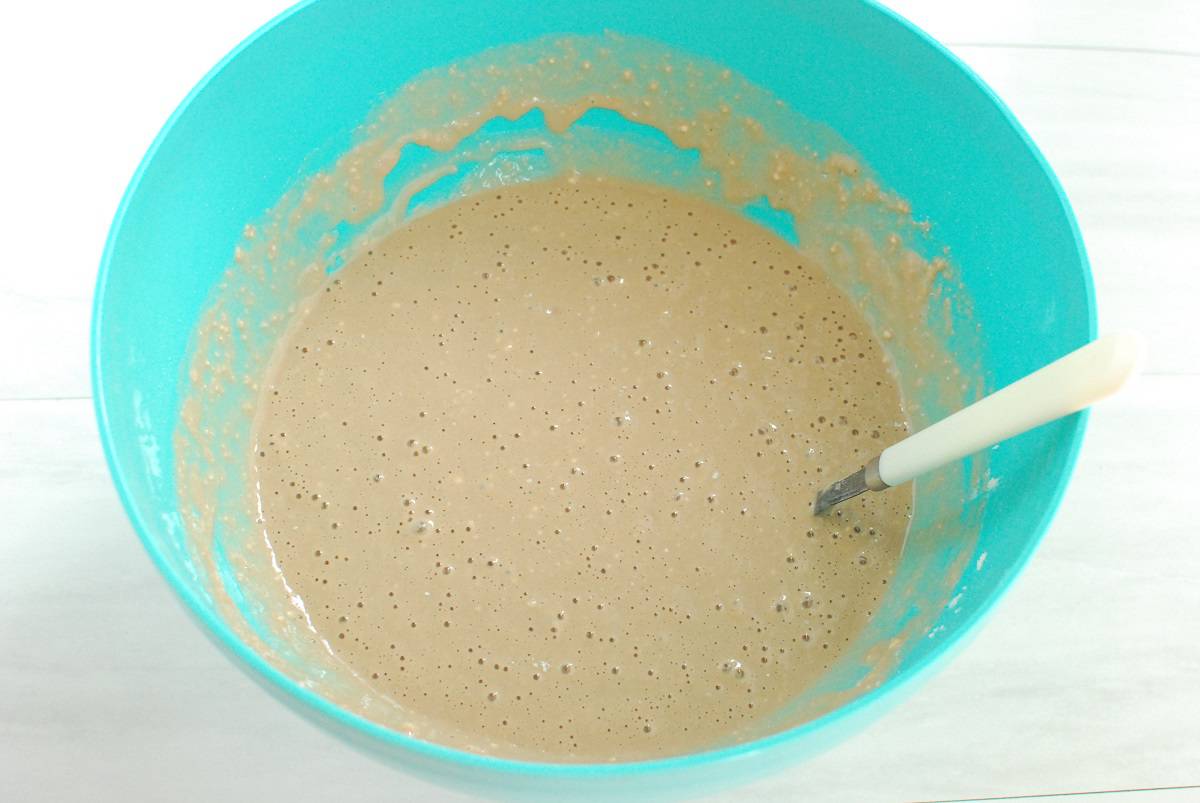
In a large bowl, whisk together the eggs, oil, and vanilla extract. Add the chocolate milk mixture.
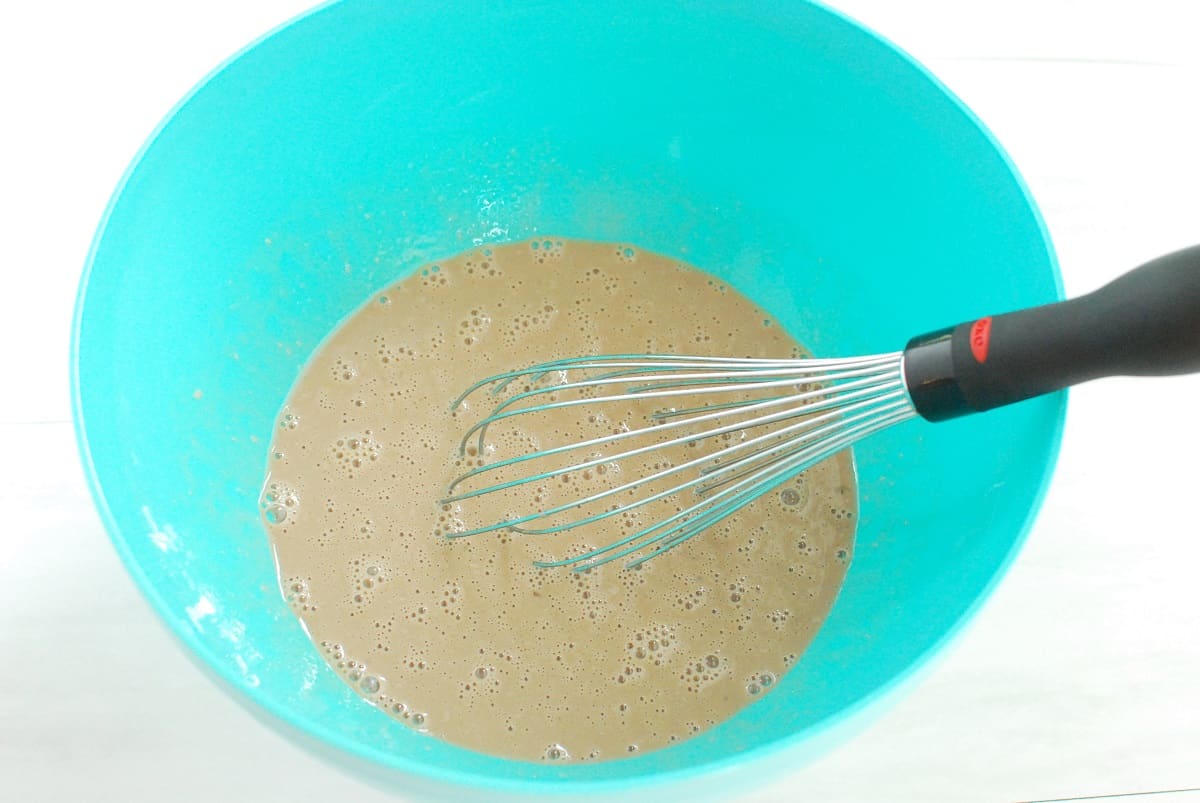
Add the flour, salt, and baking powder to the bowl. Stir everything together until well combined. Let the batter rest while you heat up your waffle iron.
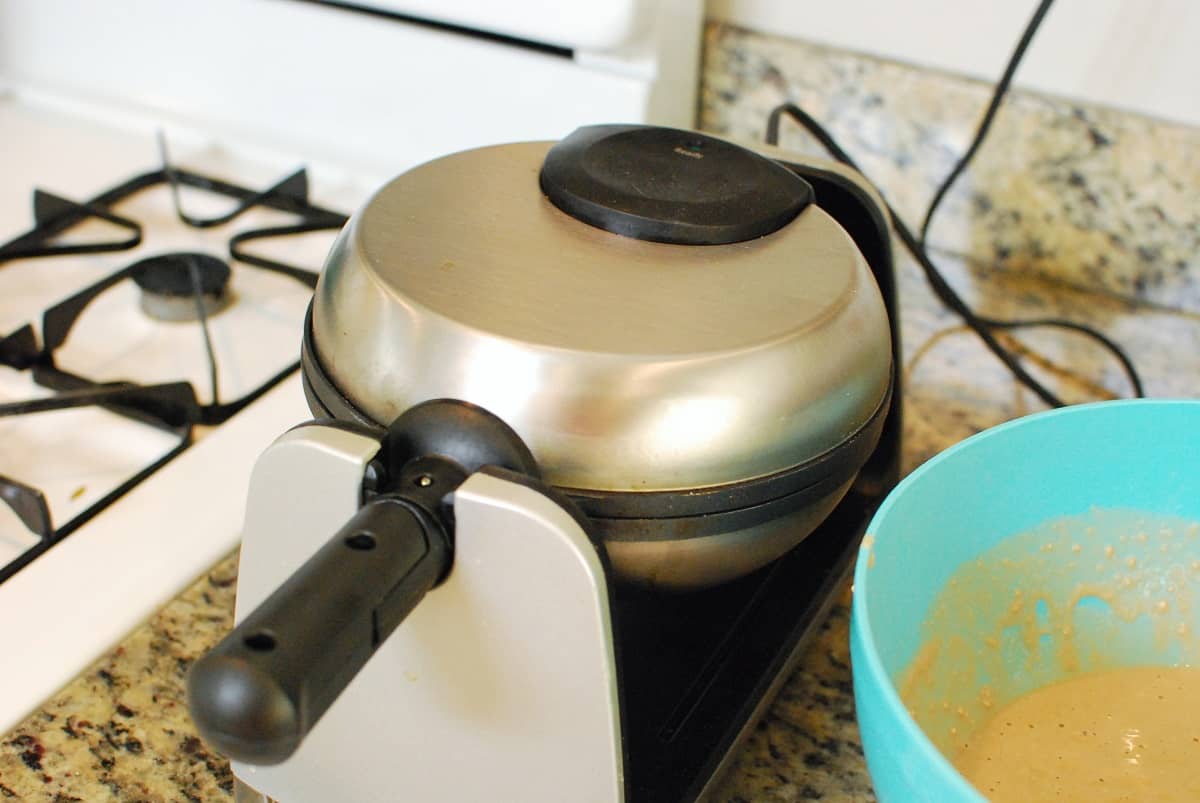
Pour the batter into the waffle iron. Most waffle irons have a light timer to indicate doneness; if yours doesn’t it should take about 2 to 4 minutes.
While it’s cooking, make your topping. Microwave the frozen berries until they’re warm. In a separate small bowl, mix together the powdered peanut butter and the HERSHEY’S a2 Milk®.
When your waffle is done, add the topping and enjoy!
Recipe FAQ
Here are some common questions that may come up as you prepare these chocolate milk waffles:
HERSHEY’S a2 Milk® is sold at a variety of stores, including retailers like Stop and Shop, Kroger, Target, Whole Foods, and more. Visit the a2 Milk® website to find out where to buy it near you.
Waffle crispness depends on a few factors – the amount of fat in the recipe, the temperature setting on your waffle iron, and how long the waffle sits after cooking. If you find your waffles are not crisp coming out of the waffle iron, turn up the temperature setting a bit. If they are crisp but then get soft on the plate, it’s likely due to sitting out at room temperature too long. Put the waffles on a rack on a baking sheet and keep them in an oven set to 200 degrees F. This will keep them crisp as you prepare the rest of the batch, so all of them will be crisp at serving.
Yes! Freeze in a zip top bag for up to 3 months. When you’d like to enjoy one, place the frozen waffle on a baking sheet and cook in an oven at 350 degrees F for about 7-10 minutes, or until crisp on the outside and warm through on the inside.
Post-Workout Meal
Ever go for a long run or ride on the weekend mornings, and start thinking about what delicious meal you’ll dig into when you finally finish the workout? That’s when I think about these chocolate milk waffles!
They are perfect after a tough workout for a few reasons:
- Provide carbohydrates and protein – After a tough endurance workout, you want to replenish both. Carbohydrates are stored in your muscles to provide energy for your next workout, and protein starts the muscle repair and recovery process.
- Excellent source of iron – Iron is key for athletes, as it’s involved in transporting oxygen to working muscles. Without enough iron, you can feel tired and your performance can suffer. One waffle plus the topping provides about 27% of your daily needs.
- Excellent source of calcium – We all know calcium is involved in bone health, so this recipe is a great way to help meet your daily needs.
- Provides phytochemicals – These are different compounds found in plant foods that are beneficial for the body. By topping your waffle with berries, you’re treating yourself to a whole host of phytochemicals in those brightly colored fruits.
I hope you enjoy this recipe as much as my family does. If you get a chance to try it, feel free to leave a recipe rating or comment below.

Chocolate Milk Waffles
Ingredients
For the waffles:
- 1 ½ cups HERSHEY’S a2 Chocolate Milk
- 2 tsp lemon juice
- 2 eggs
- 3 tbsp avocado oil (or vegetable oil)
- 1 tsp vanilla extract
- 2 cups all-purpose flour
- ¼ tsp salt
- 2 tsp baking powder
For the topping (optional):
- 3 cups frozen mixed berries
- ⅔ cup powdered peanut butter
- ½ cup HERSHEY’S a2 Chocolate Milk
Instructions
- Start by preparing the waffles. Measure out the HERSHEY’S a2 Chocolate Milk in a measuring cup, and add the lemon juice. Let sit for 5 minutes.
- In a large bowl, whisk together the eggs, oil, and vanilla. Add the chocolate milk mixture and whisk again.
- Add the flour, salt, and baking powder to the bowl. Stir until well combined.
- Let the batter rest while you preheat your waffle iron. If your waffle iron tends to stick, give it a quick shot of cooking spray once heated.
- Add the batter for one waffle (around ½ to ¾ cup batter, depending on your waffle iron). Cook according to your waffle iron’s timer, or approximately 2 to 4 minutes, until the waffle is cooked through and slightly crisp on the outside.
- Meanwhile, as waffles are cooking, prepare the topping. Heat the frozen mixed berries in the microwave for about 2 minutes, or until they are warm and juicy. In a separate bowl, mix together the powdered peanut butter and HERSHEY’S a2 Chocolate Milk.
- When the waffles are done, top them with the mixed berries and add the peanut butter chocolate drizzle. Enjoy!
Notes
- This recipe assumes 4 servings when using a large Belgian waffle maker. If using a smaller waffle maker, you’ll get more servings.
- This recipe can be halved to make two waffles.
- To keep waffles crisp while you cook the remainder of the batter, place them on a rack on top of a baking sheet in an oven set to 200 degrees F.
- If you want to make an individual-sized topping instead of toppings for all the waffles, mix 2 ½ tbsp powdered peanut butter with 2 tbsp chocolate milk, and serve with ¾ cup berries.
Nutrition
Share: What’s your favorite way to enjoy chocolate milk? If you tried these waffles, what did you think?
Feel free to pin this post to share with others!

- Chocolate Peanut Butter Protein Ice Pops - June 22, 2025
- Savory Sweetpotato Ricotta Breakfast Bowls - June 16, 2025
- Peanut Butter Honey Cheerios Bars - June 13, 2025


Leave a Reply